
Overview
Picture this: the sun’s peeking through your windows, birds are chirping, and there’s a fresh breeze in the air. Spring has sprung! But wait, what’s that lurking in the corners of your home? Dust bunnies, clutter, and forgotten messes from the long winter months. Don’t panic! It’s time to roll up your sleeves and dive into the ultimate spring cleaning adventure.
Let’s face it, the thought of deep cleaning your entire home might seem as appealing as a root canal. But trust me, the results are worth it. A clean home isn’t just about impressing your neighbors (though that’s a nice bonus). It’s about creating a fresh, healthy environment that’ll make you feel like a million bucks.
In this guide, we’re going to walk through every nook and cranny of your home, armed with cleaning supplies and a can-do attitude. We’ll tackle everything from grimy ovens to neglected closets, and even venture into the great outdoors. By the time we’re done, your home will be so spotless, you might need sunglasses indoors!
Key Takeaways:
- Learn how to prepare for an efficient spring cleaning session
- Get room-by-room checklists for thorough cleaning
- Discover eco-friendly cleaning solutions you can make at home
- Find tips for maintaining a clean home year-round
- Answer common spring cleaning questions
Preparing for Your Spring Cleaning
Alright, let’s get real for a second. Spring cleaning isn’t a sprint; it’s a marathon. And like any good marathon runner, you need to prepare before you dive in. Trust me, a little prep work now will save you a ton of headaches later.
First things first, let’s talk about the elephant in the room: clutter. You know, that pile of “I’ll deal with it later” stuff that’s been haunting your closets and drawers? Yeah, that needs to go. Before you even think about dusting or mopping, take some time to declutter. Go through each room and be ruthless. If you haven’t used it in a year, it’s time to say goodbye. Donate what you can, recycle what you must, and trash the rest. Your future self will thank you.
Now that you’ve lightened your load, it’s time to gear up. You wouldn’t go into battle without your armor, right? Well, cleaning is your battle, and your supplies are your armor. Here’s a quick rundown of what you’ll need:
- All-purpose cleaner (we’ll talk about some eco-friendly options later)
- Glass cleaner
- Disinfectant
- Microfiber cloths
- Scrub brushes
- Vacuum cleaner
- Mop and bucket
- Garbage bags
- Rubber gloves
Got everything? Great! Now, let’s talk strategy. Rome wasn’t built in a day, and your home won’t be cleaned in one either. Create a cleaning schedule that works for you. Maybe you tackle one room per day, or maybe you prefer to knock it all out in one weekend warrior session. Whatever you choose, write it down and stick to it. Having a plan will keep you motivated and on track.
Remember, spring cleaning is your chance to hit the reset button on your home. It’s not just about dusting and scrubbing; it’s about creating a fresh start. So take a deep breath, put on your favorite playlist, and let’s get cleaning!
Room-by-Room Spring Cleaning Checklist
Kitchen: Where the Magic (and Mess) Happens
Let’s start with the heart of the home: the kitchen. This is where you whip up delicious meals, share late-night snacks, and probably spill a few things along the way. It’s time to give this hardworking room some TLC.
First up, let’s tackle those appliances. Your fridge has seen you through countless midnight snack runs, so show it some love. Empty it out completely (yes, even that mysterious container at the back). Toss anything that’s past its prime, and wipe down every shelf and drawer. Don’t forget the door seals – they can harbor all sorts of gunk.
Moving on to the oven. I know, I know, it’s everyone’s least favorite job. But think of it this way: a clean oven means tastier food. Remove the racks and soak them in hot, soapy water. While they’re soaking, tackle the inside of the oven. If you’ve got a self-cleaning oven, now’s the time to use that feature. If not, roll up your sleeves and get scrubbing. A paste of baking soda and water can work wonders on stubborn stains.
Now, let’s give your microwave some attention. This little workhorse deserves better than splattered soup and exploded potatoes. Here’s a neat trick: put a bowl of water with a few lemon slices in the microwave and run it for a few minutes. The steam will loosen all that baked-on gunk, making it a breeze to wipe clean.
Next up, countertops and sinks. These surfaces see a lot of action, so they need a thorough cleaning and sanitizing. Use a disinfectant cleaner and pay extra attention to the areas around the faucet and drain. And while you’re at it, don’t forget to clean that often-overlooked garbage disposal. A handful of ice cubes and some lemon peels run through the disposal will help clean and deodorize it.
Last but not least, let’s get organized. Pull everything out of your pantry and cabinets. Wipe down the shelves, check expiration dates, and reorganize as you put things back. Consider using clear containers or labels to keep things tidy. A well-organized kitchen is a joy to cook in!
Living Room: Where Life Happens
Ah, the living room. It’s where you binge-watch your favorite shows, host game nights, and occasionally eat dinner when you’re feeling rebellious. This room sees a lot of action, so let’s give it some much-needed attention.
Start with the furniture. Your couch has probably collected more than just loose change over the past year. Vacuum it thoroughly, including under the cushions (you might find enough money for a coffee!). If you’ve got upholstered furniture, consider renting a steam cleaner for a deep clean. For leather furniture, use a leather cleaner to keep it looking its best.
Now, look up. See those dusty ceiling fans and light fixtures? Yeah, it’s time to tackle those. Use an extendable duster or a ladder (safely, please!) to reach high spots. A pillowcase can be a great tool for cleaning ceiling fan blades – slip it over the blade and pull off the dust.
Let’s not forget about the windows. They’re your portal to the outside world, so make sure they’re crystal clear. Remove and wash the curtains or blinds according to their care instructions. For the windows themselves, a mixture of vinegar and water works wonders. Don’t forget the windowsills and tracks – they can collect a surprising amount of dirt.
Got carpets? It’s time to show them some love. Vacuum thoroughly, moving furniture to get those often-missed spots. Consider renting a carpet cleaner for a deep clean, especially if you have pets or high-traffic areas.
Finally, let’s talk about those electronics. Your TV, remote controls, and game consoles are probably covered in fingerprints and dust. Use a microfiber cloth slightly dampened with a mixture of equal parts distilled water and white vinegar to clean screens. For remote controls and other small electronics, use disinfecting wipes.
Bedrooms: Your Personal Retreat
Your bedroom should be your sanctuary, a place to relax and recharge. But let’s be honest, it often becomes a dumping ground for laundry and clutter. Time to reclaim your space!
Start with the bed – after all, it’s the star of the show. Strip it down to the mattress and wash everything. I mean everything. Sheets, pillowcases, duvet covers, and even your pillows and comforter if their care labels allow. While everything’s in the wash, flip and rotate your mattress. This helps it wear evenly and can extend its life.
Now, let’s tackle that closet. I know, it’s scary in there. But you’ve got this! Take everything out and sort it into three piles: keep, donate, and toss. Be ruthless – if you haven’t worn it in a year, it’s probably time to let it go. Once the closet is empty, give it a good vacuum and wipe down the shelves. As you put things back, organize them in a way that makes sense to you. Maybe by color, or by type of clothing.
Don’t forget about your dresser drawers. Empty them out, vacuum the insides, and refold everything as you put it back. This is a great time to reassess your organizational system. Maybe those sock dividers you’ve been eyeing would be a good investment?
Dust is the enemy in the bedroom, so let’s banish it. Use your vacuum’s attachments to get into corners and along baseboards. Don’t forget to dust the tops of doors, window frames, and light fixtures. A microfiber cloth on the end of a broom can help you reach high spots without a ladder.
Finally, give some attention to your bedside tables. These often become cluttered with books, glasses, and random bits and bobs. Clear everything off, dust thoroughly, and only put back the essentials. A clutter-free nightstand can help create a more peaceful sleeping environment.
Bathrooms: Sparkling Clean Sanctuaries
Alright, let’s roll up our sleeves and dive into the bathrooms. These small but mighty rooms work hard for us every day, so they deserve some serious TLC.
First things first, let’s clear the decks. Remove everything from the counters, shelves, and bathtub edges. This will give you clear access to all surfaces. Now, it’s time to get scrubbing. Start from the top and work your way down – this way, you won’t be cleaning the same surfaces twice.
Tackle the shower and bathtub first. For tough soap scum, a mixture of equal parts vinegar and dish soap can work wonders. Spray it on, let it sit for about 15 minutes, then scrub and rinse. Don’t forget the shower curtain or doors – these can harbor mold and mildew. If you have a plastic shower curtain, you can usually toss it in the washing machine with a couple of towels for scrubbing action.
Now for everyone’s favorite – the toilet. Start by pouring a cup of baking soda into the bowl and let it sit for a few minutes. Then, add a cup of vinegar. The fizzing action will help loosen any grime. Scrub thoroughly with a toilet brush, paying extra attention to under the rim. Don’t forget to disinfect the outside of the toilet, including the often-overlooked base and behind the seat.
Moving on to the sink and countertops. A disinfectant cleaner will do the trick here. Pay special attention to the faucet and handles – these high-touch areas can harbor a lot of germs. If you have a pedestal sink, don’t forget to clean the pedestal itself.
Now, let’s talk about that often-neglected area – the grout. Mix baking soda and water into a paste, apply it to the grout lines, let it sit for a few minutes, then scrub with an old toothbrush. For really tough stains, you might need to repeat the process.
Finally, let’s get organized. Go through your medicine cabinet and under-sink storage. Toss any expired medications or beauty products. Wipe down the shelves and reorganize everything as you put it back. Consider using drawer organizers or small bins to keep things tidy.
Don’t forget the floors! Sweep or vacuum first to pick up any loose debris, then mop with a disinfectant cleaner. Pay extra attention to the areas around the toilet and in corners.
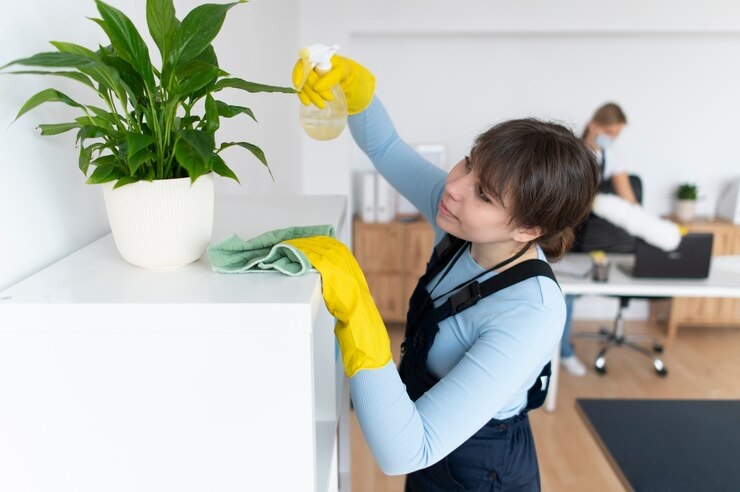
Home Office: Boost Your Productivity
In today’s world, many of us have home offices or dedicated work spaces. Whether it’s a full room or just a corner of your living room, keeping this area clean and organized can do wonders for your productivity.
Start by decluttering your desk. Be honest with yourself – do you really need all those pens? Sort through everything, keeping only what you use regularly. For papers, adopt a “touch it once” policy. Either file it, act on it, or toss it. No more shuffling papers from one pile to another!
Now, let’s talk about your computer. It’s probably covered in fingerprints, dust, and maybe even a few coffee splatters. Unplug it and give it a good cleaning. Use a can of compressed air to blow dust out of the keyboard, and a microfiber cloth slightly dampened with equal parts distilled water and white vinegar for the screen. Don’t forget to clean your mouse and mousepad too.
Got a printer? These often-neglected machines can collect a lot of dust. Unplug it, remove any paper, and use a dry microfiber cloth to wipe it down. If you have a laser printer, be careful not to disturb the toner.
Now’s a great time to organize your digital files too. Go through your computer and delete any unnecessary files. Organize what’s left into clearly labeled folders. Don’t forget to back up important documents!
If you have bookshelves in your office, take everything off and dust thoroughly. As you put books back, consider donating any that you no longer need. For the ones you keep, organize them in a way that makes sense to you – by color, author, or subject.
Finally, don’t forget about the little things. Wipe down light switches, doorknobs, and any other frequently touched surfaces with a disinfectant. These areas can harbor a lot of germs, especially if you share your home office with others.
A clean and organized workspace can help clear your mind and boost your productivity. Plus, it’ll make your next Zoom call background look a lot more professional!
General Cleaning Tasks
Now that we’ve tackled each room individually, let’s zoom out and look at some general tasks that’ll put the finishing touches on your spring cleaning masterpiece.
First up, windows. They’re your home’s eyes to the world, so let’s make them sparkle! Start by dusting the blinds or washing the curtains. Then, tackle the glass. A mixture of equal parts water and white vinegar in a spray bottle works wonders. For streak-free shine, use newspaper or a microfiber cloth to wipe. Don’t forget the windowsills and tracks – a old toothbrush can help get into those tight corners.
Next, let’s talk about those often-overlooked areas: baseboards and crown molding. These collect dust like nobody’s business. A microfiber cloth on the end of a broom can help you reach high spots without a ladder. For baseboards, a mixture of warm water and dish soap will do the trick. If they’re really grimy, you might need to break out the Magic Eraser.
Light fixtures and ceiling fans are next on our hit list. For ceiling fans, the pillowcase trick we mentioned earlier works great. For light fixtures, turn off the power, remove any removable parts, and wash them in warm, soapy water. Use a damp cloth to clean the rest of the fixture. Be sure everything is completely dry before reassembling and turning the power back on.
Now, let’s get down to the floors. Start by moving furniture (if possible) to get those often-missed spots. Vacuum carpets thoroughly, making multiple passes in high-traffic areas. For hard floors, sweep or vacuum first, then mop. Different types of flooring require different care, so be sure to use the appropriate cleaner for your floors.
Don’t forget about your air vents! These can collect a shocking amount of dust and pet hair. Remove the covers and wash them in warm, soapy water. Use your vacuum’s hose attachment to clean as far into the ducts as you can reach.
Lastly, give some attention to your walls. Dust them with a microfiber mop or a vacuum attachment. For scuffs or marks, try a Magic Eraser, but be gentle to avoid removing paint.
Remember, cleaning is like a workout for your house. And just like a good workout, you’ll feel amazing when it’s done!
Outdoor Spring Cleaning
Alright, indoor warriors, it’s time to step outside! Your home’s exterior needs some love too. Don’t worry, the fresh air will do you good after all that indoor cleaning.
Let’s start at the top – with your gutters. I know, climbing a ladder isn’t everyone’s idea of a good time, but clogged gutters can lead to serious problems. If you’re not comfortable doing this yourself, it’s worth hiring a professional. If you’re DIY-ing it, use a sturdy ladder and have someone spot you. Scoop out leaves and debris, then flush the gutters with water to check for proper drainage.
Next up, let’s talk about power washing. This is like a giant shower for your house, and it’s oddly satisfying to watch years of grime disappear. You can rent a power washer from most home improvement stores. Start with your home’s siding, working from top to bottom in sections. Then move on to your driveway, walkways, and patio. Just be careful around windows and delicate plants!
Speaking of plants, let’s give your garden some attention. Remove any dead leaves or debris that’s accumulated over the winter. Prune back dead branches from trees and shrubs. If you have a compost bin, this is a great time to turn it and add some fresh material. Don’t have a compost bin? Maybe this is the year to start one!
Now, let’s tackle your outdoor furniture. If it’s been stored away, bring it out and give it a good cleaning. For metal or plastic furniture, warm soapy water should do the trick.
For wood furniture, you’ll want to use a cleaner specifically designed for the type of wood. A mixture of oil soap and water can work well for many types of outdoor wood furniture. Be sure to rinse thoroughly and allow it to dry completely before using.
Don’t forget about your grill! If you’re a BBQ enthusiast, your grill has probably been hibernating all winter. Remove the grates and soak them in hot, soapy water. Scrub the inside of the grill with a wire brush, and don’t forget to clean out the grease trap. Check your propane tank if you have a gas grill, and consider replacing it if it’s more than 12 years old.
Lastly, let’s spruce up your home’s curb appeal. Clean your front door and give it a fresh coat of paint if needed. Polish any metal hardware. Consider adding some colorful potted plants to your porch or entryway. A new welcome mat can also make a big difference.
Conclusion: Embracing the Fresh Start
Congratulations! You’ve made it through the ultimate spring cleaning checklist. Take a moment to look around and appreciate your hard work. Your home is now clean, organized, and ready for the new season.
Remember, spring cleaning isn’t just about dusting and scrubbing. It’s an opportunity to reset, refresh, and renew your living space. A clean home can boost your mood, increase productivity, and even improve your overall health by reducing allergens and bacteria.
As you bask in the glow of your sparkling clean home, consider how to maintain this level of cleanliness throughout the year. Establishing a regular cleaning routine can help prevent the need for such an intensive cleaning session next spring. Maybe it’s dedicating 15 minutes each day to tidying up, or setting aside an hour each weekend for deeper cleaning tasks.
Don’t forget to reward yourself for all your hard work. Maybe it’s with a relaxing bubble bath in your newly scrubbed tub, or by inviting friends over to enjoy your freshly cleaned outdoor space. You’ve earned it!
Remember, a clean home is a happy home. Here’s to a fresh start and a fantastic spring season ahead! Would you like me to continue with more spring cleaning tips or elaborate on any specific area?