
Vinyl plank flooring has become a popular choice for homeowners looking to upgrade their floors. It’s a versatile flooring option that combines the natural look of wood or tile with incredible durability and affordability. In this comprehensive guide, we’ll walk you through the step-by-step process of installing vinyl plank flooring in your home.
Vinyl plank flooring offers several key benefits:
- Durability: It’s highly resistant to scratches, dents, and moisture, making it ideal for high-traffic areas like kitchens and bathrooms.
- Affordability: Compared to traditional hardwood or ceramic tile, vinyl plank flooring is a cost-effective solution.
- Easy Installation: With the right tools and techniques, you can install vinyl plank flooring yourself, saving on labor costs.
By following this guide, you’ll learn how to prepare your space, lay the planks, and add the finishing touches to achieve a beautiful, long-lasting floor.
Preparing for Installation
Gather the Necessary Tools and Materials
Before you begin, make sure you have all the essential tools and materials on hand:
- Vinyl plank flooring
- Underlayment (if required)
- Tapping block
- Pull bar
- Utility knife
- Measuring tape
- Pencil
- Chalk line
- Spacers
- Hammer
- Jigsaw or circular saw
Having everything ready will ensure a smooth and efficient installation process.
Prepare the Subfloor
A clean, level subfloor is crucial for a successful vinyl plank flooring installation. Here are the steps to prepare your subfloor:
- Remove any existing flooring, such as carpet or tile.
- Clean the subfloor thoroughly, removing any debris or dust.
- Repair any cracks, holes, or uneven surfaces using a concrete patching compound or self-leveling compound.
- Ensure the subfloor is dry and free of moisture.
If you’re installing vinyl plank flooring over a concrete subfloor, an underlayment can provide additional moisture protection and sound insulation.
Acclimate the Vinyl Plank Flooring
Allowing the vinyl plank flooring to acclimate to the room’s temperature and humidity levels is crucial for a successful installation. Here’s how to properly acclimate the flooring:
- Remove the flooring from its packaging and spread it out in the room where it will be installed.
- Let the flooring sit in the room for at least 48 hours before installation.
- Maintain the room’s temperature between 65°F and 85°F during the acclimation period.
Acclimating the flooring helps prevent it from expanding or contracting after installation, which can lead to gaps or buckling.
Laying the First Row
Measure and Mark the Starting Wall
Choosing the right starting wall and ensuring it’s square is essential for a successful installation. Follow these steps:
- Measure the room’s dimensions to determine the best starting wall based on the room’s layout.
- Use a chalk line to mark a straight line along the starting wall. This will guide the placement of your first row of planks.
Cut the First Row to Size
To ensure a proper fit, you’ll need to cut the first row of vinyl plank flooring to size. Here’s how:
- Measure the distance from the starting wall to the opposite wall.
- Subtract the width of the planks and the space needed for expansion (usually 1/4 inch) from the measured distance.
- Using a utility knife or saw, cut the planks to the appropriate length.
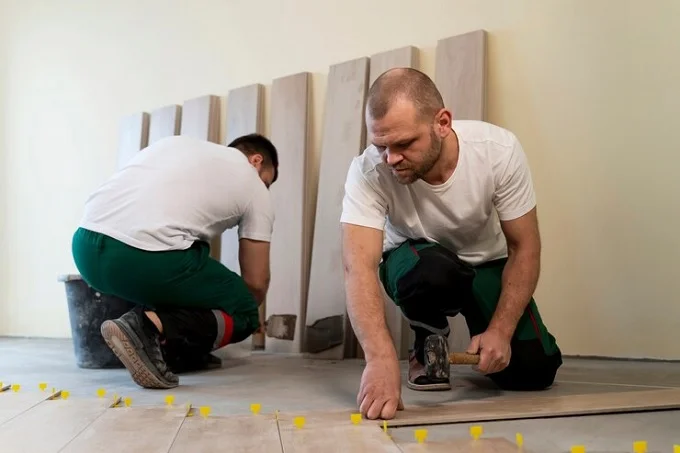
Install the First Row
Now it’s time to install the first row of vinyl plank flooring:
- Place the first plank in the corner of the room with the tongue facing the wall. Ensure it’s aligned with the chalk line.
- Secure the plank in place with spacers along the walls to maintain the expansion gap.
- Continue installing the remaining planks in the first row, making sure they’re tightly locked together.
Remember to maintain a consistent expansion gap along the walls, as the flooring will need room to expand and contract with temperature changes.
Installing Subsequent Rows
Stagger the Seams
To create a more natural and visually appealing floor, it’s important to stagger the seams between rows. Here’s how:
- Start each new row with a plank cut to a different length than the previous row.
- Ensure a minimum stagger of 6 inches between seams.
Staggering the seams not only enhances the aesthetic appeal but also adds strength and stability to the flooring.
Lock the Planks Together
Proper locking is crucial for a secure and seamless installation. Follow these steps:
- Place the tongue of the new plank into the groove of the installed plank at a 20-30 degree angle.
- Press the plank down firmly until it locks into place.
- If needed, use a tapping block and hammer to ensure a tight fit.
Cut Around Obstacles
When installing vinyl plank flooring, you’ll likely encounter obstacles like door frames, pipes, and cabinets. Here’s how to cut the planks to fit around these obstacles:
- Measure the obstacle and transfer the measurements to the plank.
- Using a jigsaw or circular saw, cut the plank to fit around the obstacle.
- Ensure a tight fit by making any necessary adjustments.
Install the Final Row
Installing the final row can be a bit tricky, but with the right technique, you can achieve a seamless finish:
- Measure the distance between the installed flooring and the wall.
- Cut the planks to the appropriate width using a utility knife or saw.
- Secure the final row in place using a pull bar and hammer.
Finishing Touches
Install Baseboards and Trim
To create a polished and finished look, installing baseboards and trim is essential. Here’s how:
- Measure and cut the baseboards and trim to size.
- Secure them in place using finishing nails or adhesive.
- Caulk any gaps between the baseboards, trim, and the wall for a seamless appearance.
Clean Up and Enjoy Your New Floor
Congratulations! You’ve successfully installed your new vinyl plank flooring. Now it’s time to clean up and enjoy your beautiful new floor:
- Remove any debris or excess materials from the area.
- Clean the floor thoroughly using a damp mop or vacuum cleaner.
- Follow any maintenance tips provided by the manufacturer to keep your flooring looking its best.
Conclusion
Installing vinyl plank flooring is a rewarding DIY project that can transform the look and feel of your home. By following this step-by-step guide, you’ve learned how to prepare the space, lay the planks, and add the finishing touches to achieve a professional-looking installation.
Vinyl plank flooring offers durability, affordability, and a wide range of styles to suit any decor. With proper installation and maintenance, your new floor will provide years of beauty and functionality.
Don’t be afraid to tackle your own vinyl plank flooring installation project. With the right tools, materials, and a little patience, you can achieve stunning results and enjoy the satisfaction of a job well done.
H2 Headings
Preparing for Installation
- Gather the Necessary Tools and Materials
- Prepare the Subfloor
- Acclimate the Vinyl Plank Flooring
Laying the First Row
- Measure and Mark the Starting Wall
- Cut the First Row to Size
- Install the First Row
Installing Subsequent Rows
- Stagger the Seams
- Lock the Planks Together
- Cut Around Obstacles
- Install the Final Row
Finishing Touches
- Install Baseboards and Trim
- Clean Up and Enjoy Your New Floor
Lists
Essential Tools and Materials:
- Vinyl plank flooring
- Underlayment (if required)
- Tapping block
- Pull bar
- Utility knife
- Measuring tape
- Pencil
- Chalk line
- Spacers
- Hammer
- Jigsaw or circular saw
Steps to Prepare the Subfloor:
- Remove any existing flooring
- Clean the subfloor thoroughly
- Repair any cracks, holes, or uneven surfaces
- Ensure the subfloor is dry and free of moisture
Table
| NLP Keyword | Description |
|---|---|
| floor | The surface area we walk on |
| wood floor | A floor made of wood planks or tiles |
| tile | A hard, durable material used for flooring |
| right floor | Choosing the appropriate flooring for your needs |
| carpet | A textile floor covering |
| vinyl flooring | A resilient flooring option made of synthetic materials |
| hardwood | A type of flooring made from solid wood |
| hardwood floor | A floor made of solid wood planks |
| type of flooring | The various materials used for flooring |
| floor material | The substance or material used to construct a floor |
| laminate | A type of flooring with a wood-like appearance |
| flooring option | One of the available choices for floor coverings |
| bathroom | A room designed for bathing and personal hygiene |
| porcelain tile | A type of ceramic tile known for its durability |
| plank | A long, flat piece of wood or vinyl used for flooring |
| kitchen | A room designed for cooking and food preparation |
| durable | Able to withstand wear and tear |
| tile floor | A floor made of ceramic, porcelain, or stone tiles |
| luxury vinyl | A high-quality and visually appealing vinyl flooring |
| porcelain | A type of ceramic material used for tiles |
| laminate flooring | A type of flooring that mimics the look of wood or stone |