
Overview
We’ve all been there – dealing with a plumbing emergency that catches us off guard and leaves us scrambling. Whether it’s a clogged drain, a leaky pipe, or a water heater on the fritz, these issues can be a major headache (and a major hit to your wallet). But what if I told you that you could avoid most of these plumbing nightmares with a little preventative maintenance? That’s right, by taking a few simple steps to care for your pipes and fixtures, you can save yourself a ton of time, money, and stress down the line.
Key Takeaways
- Preventative plumbing maintenance helps catch small issues before they become big (and expensive) problems
- Regular maintenance tasks like leak detection, drain cleaning, and water heater flushing are easy DIY jobs
- Taking a proactive approach to plumbing care extends the lifespan of your system and avoids costly repairs or replacements
- Even with DIY maintenance, it’s still important to get professional inspections and service as needed
Introduction
Look, we get it – plumbing isn’t exactly the sexiest topic. But trust us, a little preventative TLC for your pipes and fixtures will pay off big time in the long run. Not only does it help you avoid those middle-of-the-night emergencies that no one wants to deal with, but it can also save you some serious cash.
Think about it this way: would you rather spend a little time and effort on routine maintenance, or shell out hundreds (or even thousands) of dollars for a major repair job or system replacement down the road? Yeah, we thought so.
Plus, there are some great benefits beyond just cost savings. Preventative maintenance also helps extend the lifespan of your plumbing system, improves water efficiency (hello, lower utility bills!), and gives you peace of mind knowing your pipes are in tip-top shape.
Now, we know what you’re thinking – plumbing maintenance sounds like a hassle. But trust us, once you get in the swing of it, it’s really not that bad. A lot of the basic tasks are simple enough for any homeowner to tackle. And for the trickier stuff? That’s what professional plumbers are for.
So let’s dive into the nitty-gritty of preventative plumbing maintenance, shall we? By the end of this article, you’ll be a pro at keeping your pipes happy and healthy. No more plumbing headaches for you!
Leak Detection and Prevention
1. Monitoring Water Usage and Bills
One of the easiest ways to catch a leak early is to keep an eye on your water usage and utility bills. If you notice a sudden spike in your water consumption (and your bill), but no obvious explanation like house guests or a new appliance, chances are you’ve got a leak somewhere.
2. Inspecting Pipes
At least once a year, do a visual inspection of any exposed pipes in your home. Look for signs of corrosion, cracks, dampness, or mineral buildup, which could all indicate a slow leak. Pay special attention to areas like basements, crawl spaces, and under sinks where pipes are more vulnerable.
3. Toilet Leak Tests
Toilets are one of the most common culprits for hidden leaks. An easy test is to put a few drops of food coloring in the tank and let it sit for 30 minutes without flushing. If the colored water shows up in the bowl, you’ve got a leak that needs fixing. You can also try the old-school toilet paper test – stick a piece of TP against the flush valve gaskets and strike plate. If it’s damp after a while, time for a new flapper!
4. Locating the Main Shut-Off
Hopefully, you never have to use it, but part of leak prevention is knowing where your home’s main water shut-off valve is located and how to operate it. This allows you to stop flooding quickly if a major leak does occur while you wait for the plumber.
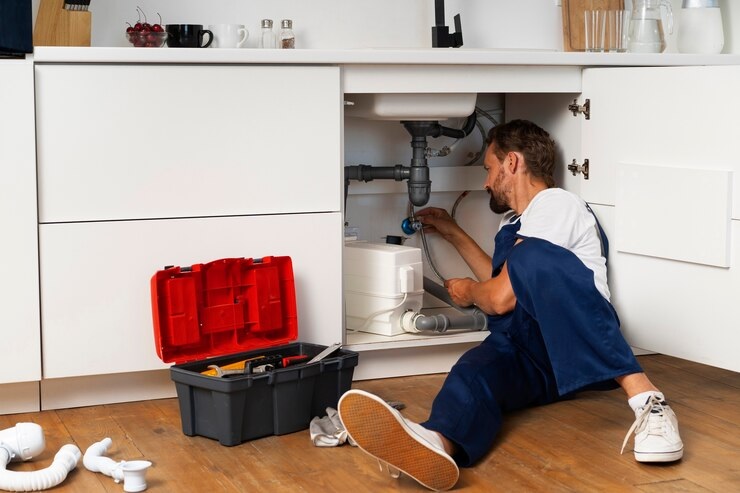
5. Professional Leak Detection
For tough-to-find leaks, it may be worth calling in a pro. Plumbers have nifty tools like acoustic leak detectors and thermal imaging cameras that can pinpoint the source of water escaping your pipes, even behind walls or underground.
Water Heater Maintenance
(Listing Format)
Your water heater works hard to supply your home with hot water 24/7. A little regular maintenance goes a long way toward keeping it running efficiently and avoiding nasty problems like tank leaks or running out of hot water mid-shower (the horror!). Here are some key water heater maintenance tasks:
- Flush the Tank – Over time, sediment from the water builds up in the bottom of the tank. This creates hot spots that can lead to premature tank failure. Draining a few gallons from the tank every 6-12 months removes that sediment and helps extend your heater’s lifespan.
- Watch for Warning Signs – Pay attention to things like rust-colored hot water coming from faucets, rumbling or popping noises from the tank, or a lack of hot water even after letting it recover. These could all signal a water heater issue that needs attention.
- Get It Inspected – While you can handle basic flushing yourself, it’s still a good idea to have a professional inspect and service your water heater annually. A trained eye can catch potential problems like anode rod depletion or tank corrosion before they become big (and expensive) issues.
- Insulate and Maintain – Insulating your tank and pipes helps the heater operate more efficiently and prevents heat loss. Also be sure to check the temperature/pressure relief valve annually to ensure it’s working properly.
Keeping Drains Clear
(Table Format)
| Signs of a Clogged Drain | Preventative Measures |
|---|---|
| Slow draining water | Install drain covers/filters to catch hair and debris |
| Gurgling noises | Use a drain snake or baking soda/vinegar solution monthly |
| Bad odors from drain | Avoid pouring grease/oils down drains |
| Multiple clogged drains | Have drains professionally cleaned annually |
When it comes to drains, an ounce of prevention is worth a pound of cure. Neglecting drain maintenance leads to nasty clogs that can back up sewage into your home (yeah, we’ll let you stew on that lovely visual for a minute).
The good news is, keeping drains clear and flowing freely is a pretty simple task in most cases. Using drain covers to catch hair and food particles goes a long way. You can also try a monthly drain cleaning regimen with a simple baking soda and vinegar solution.
If you do run into a clogged drain, start with a basic drain snake or plunger to try and dislodge the blockage. Just be careful not to go too crazy with chemical drain cleaners, as they can damage older pipes. If the clog persists or you’ve got multiple drains acting up, it’s probably time to call in a professional drain cleaning service.
Oh, and one drain no-no we have to mention? Never, ever pour cooking grease or oils down your drains. That’s just asking for a giant, congealed clog-monster to form in your pipes. Not a pretty sight (or smell).
Managing Water Pressure
Did you know that both high and low water pressure can potentially cause plumbing issues in your home? It’s true! The ideal range for household water pressure is between 40-60 PSI (pounds per square inch). Anything outside that range puts extra strain on your pipes and fixtures.
High Water Pressure (>60 PSI) can:
- Increase the risk of leaks by stressing pipe joints and fittings
- Cause early fixture failure with the constant pounding force
- Result in noisy, whistling pipes as the water rushes through
Low Water Pressure (<40 PSI), on the other hand:
- Reduces water flow to fixtures, making tasks difficult
- Can cause odd noises or vapor locks in pipes
- Allows sediment to more easily accumulate in pipes
So how do you get your water pressure regulated to the sweet spot? Easy – install a pressure-reducing valve (PRV) on the main water line coming into your home. This will automatically reduce high incoming pressure to a safe level.
You’ll also want to ensure your home’s pipes are properly sized to accommodate your typical water demand and prevent low pressure issues. If you’re renovating or adding plumbing fixtures, have a pro assess whether you need to upsize any supply lines.
Garbage Disposal Care
Alright, folks, time for a quick tutorial on keeping your garbage disposal happy and healthy. While these handy kitchen appliances make cleaning up after meal prep a breeze, they do require some basic maintenance to avoid clogs, leaks, and other nasty problems.
First thing’s first – use that disposal regularly! Letting food waste sit in there is just asking for trouble. Get in the habit of running the disposal every time you have scraps, using plenty of cold water to flush everything down. The cold water helps solidify any grease or oils so they can be chopped up instead of congealing in your pipes.
Speaking of what not to put down the disposal, you’ll want to avoid:
- Fibrous items like celery stalks, corn husks, or artichoke leaves
- Bones, pits, and other hard objects that can’t be ground up
- Expandable foods like rice or pasta that could swell and clog pipes
- Liquid fats/grease that can re-solidify and cause blockages
If your disposal does get jammed up, don’t just keep running it – that’s a surefire way to burn out the motor. Instead, use the reset button (usually a small hole on the bottom) and follow the manufacturer’s instructions for safely unjamming the blades.
Another important task? Running your disposal frequently with some ice cubes and a bit of rock salt or citrus peels. This helps scrub away buildup on the blades and walls, keeping everything fresh.
And finally, pay attention to any unusual noises, leaks around the disposal, or persistent odors. These could mean it’s time for a professional inspection or potentially a replacement unit. Disposals typically last 8-15 years with proper care.
Outdoor Plumbing Maintenance
We spend so much time focusing on the pipes inside our homes that it’s easy to overlook the outdoor plumbing components. But giving your exterior pipes, faucets, and fixtures a little TLC is crucial too. Here are some key outdoor plumbing maintenance tasks:
Insulate Exposed Pipes Any pipes that run along exterior walls or through unheated spaces need proper insulation to prevent freezing and bursting in winter months. Foam pipe insulation is inexpensive and easy to install.
Check Hose Bibs Inspect outdoor faucets and hose bibs annually for any cracks, leaks, or loose fittings that could cause problems. Replace worn rubber hose gaskets as needed.
Mind the Drainage Poor drainage around your home’s foundation can lead to leaks and moisture issues in the basement or crawlspace. Keep an eye out for pooling water and ensure that the ground slopes away from the home properly.
Winterize Sprinklers/Irrigation If you have an in-ground sprinkler or irrigation system, be sure to properly drain, blow out, and winterize all components before freezing temperatures set in to avoid cracked pipes and broken sprinkler heads.
When to Call a Professional
While many basic plumbing maintenance tasks are easy enough for homeowners to handle themselves, there are certainly times when it’s best to call in a licensed, professional plumber. Here are some scenarios where the pros should take over:
- Major Leaks: If you have a serious water leak that is gushing or you can’t locate the source, don’t delay – shut off the main water supply and call a plumber immediately before flooding and water damage occurs.
- Stubborn Clogs: If you’ve tried a plunger and drain snake without success in clearing a clogged drain, professional drain cleaning with specialized equipment may be needed to tackle the blockage.
- Low Water Pressure: While installing a PRV can help with high pressure issues, resolving persistently low water pressure often requires diagnostics that plumbers are equipped to handle.
- Renovation/Remodel Projects: Any time you’re making major changes to plumbing configurations by moving fixtures or adding new supply lines, it’s wise to have professional oversight.
- Annual Inspections: Even with DIY maintenance, most plumbers recommend scheduling an annual professional plumbing inspection to catch any potential issues before they become costly problems.
The bottom line? Knowing when to throw in the towel and call a pro can save you a major headache and protect your plumbing system in the long run. Licensed plumbers have the training, tools, and expertise to properly diagnose and repair complex plumbing problems that are over most homeowners’ heads.
Calculating Preventative Maintenance ROI
At this point, the value of preventative plumbing maintenance should be pretty apparent. But for those who love crunching numbers, you can actually calculate an estimated return on investment (ROI) for routine maintenance versus the costs of repairs or replacements down the road.
Here’s the basic formula:
ROI = (Gains from Investment – Cost of Investment) / Cost of Investment
To calculate preventative plumbing maintenance ROI specifically:
1) Estimate the costs you’d incur for any major repairs, replacements, or emergency service over, say, a 10 year period if you skipped maintenance entirely. Let’s use a hypothetical total of $5,000 for this example.
2) Next, estimate the cost of routine DIY maintenance tasks like flushing the water heater, drain cleaning, leak inspections, etc. over that same timeframe. Let’s say that comes out to $500.
3) Then, factor in the costs of any professional services like annual plumbing inspections, water heater services, etc. We’ll estimate $2,000 for this example.
4) So your total maintenance “investment” is $500 + $2,000 = $2,500
5) Your “gains” are avoiding those $5,000 in repair costs, so: ROI = ($5,000 – $2,500) / $2,500 = 1
This equates to a 100% ROI just from taking a proactive approach to plumbing maintenance! Sure, your exact numbers may vary. But as this example illustrates, the long-term savings from preventative care can really pay off in a big way.
Conclusion
There you have it, folks – a comprehensive guide to keeping your pipes happy and healthy through preventative plumbing maintenance. By now, you should be a pro at leak detection, drain cleaning, water heater care, and all the other key tasks.
But just to quickly recap, the main things to focus on are:
- Monitoring for leaks through water bill tracking and pipe inspections
- Flushing the water heater annually and watching for warning signs
- Using filters/covers and regular cleaning to keep drains flowing
- Regulating water pressure to the ideal 40-60 PSI range
- Proper care and maintenance for garbage disposals
- Not overlooking outdoor plumbing components
- Knowing when to call in a licensed professional plumber
The key is getting on a regular maintenance schedule and developing good plumbing habits. Create a checklist of tasks to complete monthly, quarterly, and annually so nothing slips through the cracks. Mark it on your calendar, set reminders, do whatever you need to do to stay on top of it.
At the end of the day, being proactive with preventative maintenance saves you a ton of money and headaches compared to the costs of emergency repairs and replacements. Your pipes will certainly thank you for the TLC! So get out there and start giving your plumbing system the care and attention it deserves.